Seamlessly Transition to Faster Speeds: Transferring Your Operating System to an SSD
If your computer is feeling slower than molasses in January, transferring your operating system to a solid-state drive (SSD) might be the turbo boost it needs. Imagine turning on your computer and having everything ready to go in seconds. That’s the magic of an SSD. Whether you're a gamer looking for quicker load times, a professional seeking snappier performance, or someone tired of sluggish startups, this guide will walk you through everything you need to know about making the switch. Let’s dive in!
Why Transfer Your Operating System to an SSD?
The allure of SSDs is undeniable. Unlike traditional hard drives (HDDs), SSDs have no moving parts, which means they're faster, quieter, and more reliable. Making the switch offers several benefits:
- Speed Boost 🚀: SSDs dramatically reduce boot times and application load times.
- Durability: With no moving parts, SSDs are less prone to mechanical failure.
- Energy Efficiency: SSDs consume less power, extending battery life in laptops.
When these benefits are weighed, it's clear why many consider the transition a worthwhile investment. But how do you actually go about it?
Pre-Transfer Preparation
Before you start, there’s some crucial preparation involved. Here’s a checklist to ensure everything goes smoothly:
1. Backup Your Data
The first step in this process is safeguarding your information. Use an external hard drive or a cloud service to backup:
- Documents and Files: Photos, music, videos, and important documents.
- Application Data: Data from critical applications that you can't reinstall or recover.
2. Choose the Right SSD
Not all SSDs are created equal. Here are factors to consider when choosing your new drive:
- Capacity: Opt for at least 500GB for a balanced cost-performance ratio.
- Form Factor: Ensure compatibility with your device (e.g., 2.5 inch for most laptops and desktops).
- Interface: SATA for older machines and NVMe for newer setups with M.2 slots.
3. Organize Your Existing Disk
To make sure everything fits comfortably on the SSD:
- Perform a Disk Cleanup: Remove unnecessary files with disk cleanup tools.
- Defragment Your Drive: Although less crucial for SSDs, defragging HDD can make the migration smoother.
The Transfer Process: Step-by-Step
1. Clone Your HDD to the SSD
Cloning is the heart of the transfer process. Here’s how you can clone your existing operating system:
- Choose Cloning Software: Utilize tools like Macrium Reflect or EaseUS Todo Backup.
- Install the SSD: Connect the SSD to your computer via a SATA cable or USB-to-SATA adapter.
- Launch Cloning Software: Select your source drive (HDD) and target drive (SSD).
- Begin the Clone: Follow the tool’s instructions, ensuring you select the ‘System Clone’ to include necessary boot partitions.
Pro tip: Make sure to choose the option that auto-adjusts the partitions to fit the smaller SSD if the source is larger.
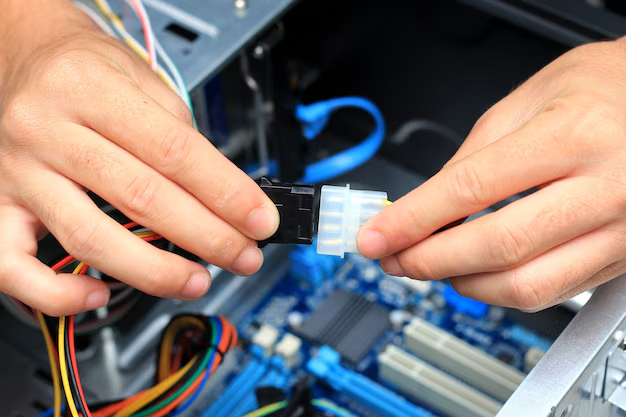
2. Physically Install the SSD
Once the cloning is done:
- Turn Off and Unplug Your Computer: Safety first!
- Install the SSD: If you used a USB adapter, now install the SSD into your computer. Check your device’s manual for specific instructions.
3. Configure the BIOS
With the SSD secured, adjust the BIOS settings to boot from it:
- Access BIOS/UEFI: This might be the F2, F12, Delete, or Esc key during startup.
- Set Boot Order: Arrange the SSD as the first boot device.
- Save and Exit: Restart your computer to boot from the SSD.
Post-Transfer Tweaks and Tips
1. Enable AHCI Mode
Switching to AHCI in the BIOS/UEFI after the transfer can improve SSD performance. However, be cautious and follow necessary steps to avoid boot issues:
- Backup your registry and follow a reputable guide to modify system settings.
2. Disable Defrag and Enable TRIM
Windows should automatically enable TRIM, but it's good to check:
- Search “Defragment and Optimize Drives”: Ensure TRIM is active for your SSD.
- Disable Scheduled Defrags: Weekly defrags are unnecessary for SSDs.
3. Free Up Space
SSD performance can degrade as it fills up. Keep it snappy by:
- Avoiding Full Capacity: Maintain at least 10-15% free space.
- Using External Storage: Shift infrequently accessed data to an external drive.
Summary of Steps and Tips for a Smooth Transition
Here’s a quick overview to ensure a seamless move to SSD bliss:
- Backup: Ensure all your data is safe.
- Cloning Software: Choose reliable tools for hassle-free cloning.
- Hardware Check: Ensure you have the right SSD and connectors.
- BIOS Adjustments: Boot from the SSD confidently.
- Post-Installation: Enable AHCI, check TRIM, and manage drive space effectively.
Important Takeaways:
- Backup Data: Essential for peace of mind.
- Choose the Right SSD: Balances cost and performance.
- Regular Cleanup: Keep your SSD at optimal performance levels.
Maximizing Your SSD Experience
Moving to an SSD is just the beginning of transforming your computing experience:
Enhance System Performance
- Regular Updates: Keep your OS and drivers current for optimal performance.
- Optimize Startup Programs: Limit them to reduce boot time further.
Protect Your Data
- Automated Backups: Use cloud storage or an external drive for regular backups.
- Monitor Drive Health: Utilize tools to keep an eye on SSD health.
Once your OS resides on an SSD, you'll notice a living, breathing improvement in your daily computing tasks — from booting up to running applications. With this guide, you’re equipped not only to transfer your OS but to enjoy a more responsive, reliable computing environment. The shift might seem daunting at first, but taking the plunge can breathe new life into old or new machines alike, making those mundane waits a thing of the past. Here’s to a faster and more efficient digital experience!
Related Topics
- How Can I Transfer Data From One Laptop To Another
- How Can I Transfer Domain To Godaddy
- How Can I Transfer My Calls To Another Phone
- How Can I Transfer Pdf To Word
- How Can We Transfer Data From One Laptop To Another
- How Can You Transfer Data From One Phone To Another
- How Can You Transfer Emails From One Account To Another
- How Can You Transfer Vhs Tapes To Dvd
- How Do I Transfer a Prescription From Walgreens To Cvs
- How Do I Transfer Data From Ipad To Ipad