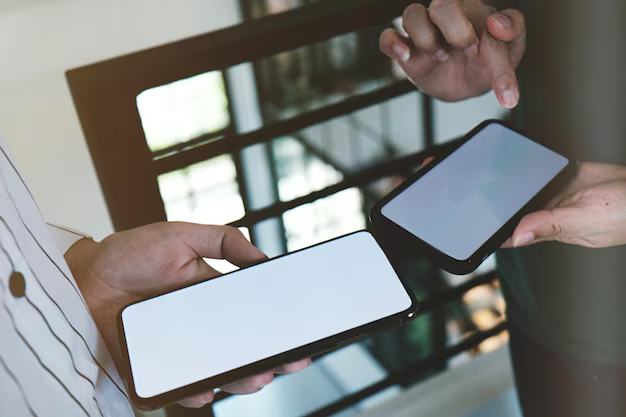
A Seamless Transition: How to Transfer Your Photos from Android to iPhone
Switching from an Android device to an iPhone can be a thrilling experience, integrating you into the Apple ecosystem with its sleek design, robust security features, and seamless synchronization across devices. However, one major hurdle many users face during this transition is transferring personal data, particularly photos, from their old Android phone to a new iPhone. This guide will walk you through the process step-by-step, ensuring your treasured memories move with you smoothly and securely.
Why Transfer Photos Between Devices?
Before we explore the methods, it's worth considering why transferring photos from your Android to iPhone is vital. Photos are more than just digital files; they are memories, documentation of life's precious moments. Whether it's a family holiday, a birthday party, or snapshots of everyday life, these images hold sentimental value and deserve a safe journey to your new device.
Methods to Transfer Photos from Android to iPhone
Several methods allow you to transfer photos between these platforms. Each option has its benefits and limitations, and the best choice depends on your specific needs and situation.
1. Move to iOS App
The Move to iOS app is one such option that enables you to transfer data from Android to iPhone wirelessly. It's Apple's dedicated app for this purpose, making it a popular choice for many users.
How to Use Move to iOS
Download and Install the App:
- Download the Move to iOS app from the Google Play Store on your Android device.
Setup on iPhone:
- During the initial setup of your new iPhone, choose 'Move Data from Android'.
Connection and Transfer:
- Ensure both devices are connected to the same Wi-Fi network. On your Android device, open the Move to iOS app, then enter the security code displayed on your iPhone.
- Select the photos and other data you wish to transfer. Tap 'Next' and allow the transfer to complete.
Pros:
- Simple and straightforward.
- Transfers other data types besides photos, like contacts and messages.
Cons:
- Requires a new or reset iPhone.
- Dependent on stable internet connectivity.
2. Google Photos
If you're already using Google Photos for photo storage and backup, this method can be incredibly effective. It utilizes cloud storage to facilitate seamless transfers between devices.
How to Transfer via Google Photos
Backup Photos on Android:
- Ensure all your Android photos are backed up to Google Photos. Open the app, go to 'Settings', and enable 'Backup & Sync'.
Install Google Photos on iPhone:
- Download Google Photos from the App Store on your iPhone. Sign in with the same Google account used on your Android device.
Access Photos:
- Your photos will be readily accessible on the iPhone through the Google Photos app. You can choose to download them directly to your device's local storage if desired.
Pros:
- Does not require a new iPhone setup.
- Photos are accessible from any device connected to your Google account.
Cons:
- Limited free storage; may incur additional costs if storage limits are exceeded.
- Dependent on internet connectivity for uploads and downloads.
3. Dropbox or Other Cloud Storage Services
Dropbox and similar cloud storage services (like OneDrive or Box) can also serve as intermediaries for transferring your photos. These apps offer an alternative to Google Photos for those who prefer different services.
Steps to Transfer Using Dropbox
Upload Photos:
- On your Android device, open Dropbox and upload the photos you wish to transfer.
Access on iPhone:
- Install the Dropbox app on your iPhone, log in to the same account, and download your photos.
Pros:
- Flexible storage solutions with a variety of services.
- Efficient for selective photo transfers.
Cons:
- Free storage space may be restricted.
- Slightly more manual than other methods.
4. Manual Transfer via Computer
For those who prefer a more manual approach, transferring photos via a computer is a reliable option and doesn't rely on cloud storage or apps.
How to Transfer with a Computer
Connect Android to Computer:
- Use a USB cable to connect your Android device. Access the device storage through the file manager and copy the desired photos to the computer.
Transfer to iPhone via iTunes/Finder:
- Connect your iPhone to the computer. Use iTunes (on Windows or older macOS) or Finder (on macOS Catalina and later) to sync photos from your computer to your iPhone.
Pros:
- No reliance on internet connectivity.
- Offers a physical backup of photos.
Cons:
- More labor-intensive.
- Requires a computer with enough storage.
Considerations When Transferring Photos
Transferring photos might seem straightforward, but there are several factors to keep in mind to ensure a smooth process:
Photo Quality and Format
When transferring photos, it's essential to ensure that the quality and format are preserved. Most methods maintain the original quality, but verify the settings within each transfer service to confirm this.
iCloud Storage Space
For users heavily invested in the Apple ecosystem, leveraging iCloud offers another transfer avenue. Make sure your iCloud plan has enough storage space to accommodate the incoming photos from your Android device.
Transfer Time and Speed
Consider the speed of the transfer based on the volume of photos and the chosen method. Cloud-based methods may take longer due to upload and download speeds. Conversely, direct transfers via cable are generally quicker.
Troubleshooting Common Issues
Even with the best preparation, technology can sometimes be unpredictable. Here are some common issues and their potential solutions:
- Transfer Failures: Restart both devices and ensure they are connected to a stable internet source.
- Incomplete Transfers: Double-check that all data types were selected and that devices did not disconnect during the process.
- Google Photos not Syncing: Ensure the on-device Google Photos app has 'Backup & Sync' turned on and is connected to Wi-Fi.
Visual Summary: Quick Transfer Options Guide
For skimmability and quick reference, here's a concise guide on the best methods to transfer your photos:
| Method | Pros | Cons |
|---|---|---|
| Move to iOS | Simple and integrated, transfers multiple data types 🚀 | Requires a new iPhone setup, needs Wi-Fi 😅 |
| Google Photos | Access anywhere, integrates well with Android 🌐 | Needs good internet, storage limitations might apply ⚠️ |
| Dropbox/Cloud Apps | Versatile storage, supports multiple file types 🔄 | Requires account setup and storage management 🗃️ |
| Manual Transfer | No internet required, preserves original quality 💾 | Labor-intensive, needs computer and cables 🔌 |
Making the Switch: Final Insight
Switching from Android to iPhone is easier than ever with the various tools at your disposal. Finding the right method to transfer your photos comes down to assessing your needs – whether you prioritize speed, simplicity, or control. By choosing the method that suits you best, you can ensure a smooth transition and continue to enjoy capturing new memories on your iPhone with ease.
Related Topics
- How Can I Transfer a Video From Iphone To Computer
- How Can I Transfer Apps From Iphone To Ipad
- How Can I Transfer Apps From One Iphone To Another
- How Can I Transfer Contacts From Iphone To Iphone
- How Can I Transfer Contacts From One Iphone To Another
- How Can I Transfer Data From Iphone To Android
- How Can I Transfer Data From Iphone To Iphone
- How Can I Transfer Data From Iphone To Samsung
- How Can I Transfer Files From Android To Pc
- How Can I Transfer From Iphone To Samsung