Turning Your Memories into Beautiful Wooden Art: How to Transfer Photos to Wood
Imagine your favorite photograph imprinted seamlessly on a beautiful piece of wood—turning a simple image into a stunning piece of art. This unique process of transferring photos to wood is not only straightforward but also incredibly rewarding, resulting in personalized decor that combines memory with a rustic aesthetic. Whether you’re a DIY enthusiast or someone looking to create a special gift, this guide will walk you through the steps to make your photos an integral part of wooden masterpieces.
Getting Started with Photo Transfers: The Basics
Before diving into the detailed steps, it's essential to understand the materials and the general process involved in transferring photos to wood.
Gather Your Materials
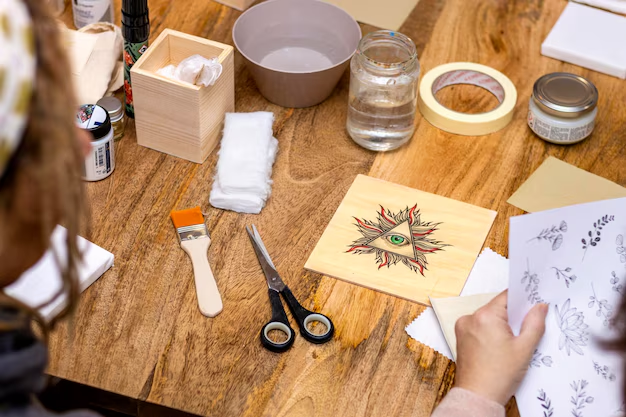
For a successful photo transfer, you'll need:
- Wood Piece: Choose a piece that’s smooth and sanded. Options range from birch plywood to reclaimed barn wood, depending on the desired finish.
- Printed Image: Use a laser-printed photo. Inkjet prints won't yield the best results in this case.
- Gel Medium: Acts as a transfer agent available in matte or gloss finishes.
- Mod Podge or Acrylic Sealer: To seal and protect the transferred image.
- Foam Brush or Paintbrush: For applying the gel medium.
- Sponge or Cloth: For removing paper backing.
- Scissors, Ruler, and Tape: For any adjustments and support during transfer.
Understand the Process
The art of photo transfer involves transferring the ink from a printed image onto a wood surface, fixed using a gel medium. Once the transfer is complete, sealing it ensures longevity and vibrancy.
Step-by-Step Guide to Transferring Photos to Wood
Preparing Your Image and Wood
Select Your Image: Pick a photo with good contrast and print it in reverse (mirrored) form. This is crucial for text or specific orientations.
Prepare the Wood: Sand the surface to ensure it’s smooth. Wipe clean of any dust, which can interfere with the transfer.
Trim Image if Necessary: Cut your printed image to fit the wood accurately, using scissors or a craft knife for precision.
Photo Transfer Process
Apply Gel Medium: With a foam brush, apply a generous, even layer of gel medium over the printed side of your image.
Place on Wood: Carefully place the image, printed side down, onto your wood. Smooth out any bubbles or wrinkles with a ruler or credit card from the center outward.
Let It Dry: Allow the image to dry for at least 24 hours. Patience is key for strong, neat adhesion.
Revealing Your Transfer
Moisten the Paper: Use a damp sponge or cloth to wet the paper backing. Ensure it’s only damp, not soaking.
Remove Paper Backing: Gently rub the paper with your fingers or a cloth to peel it away, revealing the image. Go slow to avoid tearing your freshly transferred art.
Repeat as Necessary: You might need to moisten and rub multiple times until all the paper fibers are gone, showing a clear image.
Sealing the Image
Apply Sealant: Once dry, apply a thin layer of Mod Podge or acrylic sealer over the transferred image. This protects against fading and adds a polished finish.
Let It Cure: Allow the sealant to dry completely before handling or hanging.
Adding Personal Touch: Creative Variations
Enhancing with Paint or Stain
- Stain the Wood: Before the transfer, consider staining the wood with a wood finish that complements your room's decor. Ensure it's dry before applying the gel medium.
- Add Colors: Post-transfer, delicate touches of acrylic paint can highlight certain areas, making colors pop.
Experiment with Different Woods
Each type of wood absorbs the gel medium and image differently, creating unique textures and finishes. Try:
- Pine or Oak: For defined grains that add character.
- Balsa Wood: Lightweight and easy to work with, ideal for custom ornaments.
Incorporate Shapes and Sizes
- Coasters and Magnets: Use smaller wood pieces for custom gifts.
- Wall Art: Larger panels make stunning decor statements in living spaces.
Practical Tips and Reminders
When working on this DIY project, keep these key points in mind to ensure success:
- Choose Quality Materials: Quality gel mediums and sealants can drastically affect the result, so choose brands known for their performance.
- Print Quality: High-resolution laser prints provide clarity and detail.
- Patience is Crucial: Allowing adequate drying time yields the best results; rushing may lead to unclear or incomplete transfers.
Quick Summary of Steps
Here's a quick summary to refer back to while working on your project:
🔹 Prepare Materials: Sand wood, print image inversely. 🔹 Apply Gel Medium: Spread evenly, affix image. 🔹 Let It Dry: At least 24 hours. 🔹 Remove Paper: Moisten and gently rub. 🔹 Seal Image: Apply and dry thoroughly.
Now you're ready to transform your cherished photos into durable, eye-catching wooden art! Embrace the creativity that this process offers, and experiment with different images, woods, and finishes.
By understanding and following these steps, along with the creative enhancements, you’ll find this craft not only enjoyable but also deeply satisfying. These personalized art pieces are bound to be conversation starters, whether in your own home or gifted to cherished friends and family. Unleash your creativity, and bring your memories to life on beautiful wooden canvases!
Related Topics
- How Can I Transfer Contacts To My New Phone
- How Can I Transfer Music From My Ipod To Computer
- How Can I Transfer My Contacts To Another Phone
- How Can I Transfer Photos From Camera To Computer
- How Can You Transfer Text Messages To a New Phone
- How Do I Transfer Apps To My New Phone
- How Do I Transfer Contacts From One Phone To Another
- How Do I Transfer My Contacts To Another Phone
- How Do I Transfer My Contacts To My New Phone
- How Do I Transfer Phone Contacts To New Phone